Monday, April 8, 2013

Taggie Blanket for Baby - Tag Lovey

Want to make a taggie blanket for a baby in your life? They make great baby shower gifts!


Start by cutting two coordinating fabric pieces (I suggest at least one piece be something very soft- I used fleece) into 13x13 squares. The blanket will end up being 12x12 after you sew it.

This picture only shows one of my pieces, but you get the idea.


Then cut 25 strips of coordinating ribbon. The length is up to you, but you will want them to be long enough to stick out decently far from the blanket, as well as having at least an inch inside the blanket.


Lay your back fabric right side up and fold and pin down your ribbons. The loop of the ribbon should be facing INWARD so that when you turn the blanket inside out, the ribbons hang out.


Pin your front fabric right sides together with the back fabric (the ribbons should be between the two pieces of fabric).


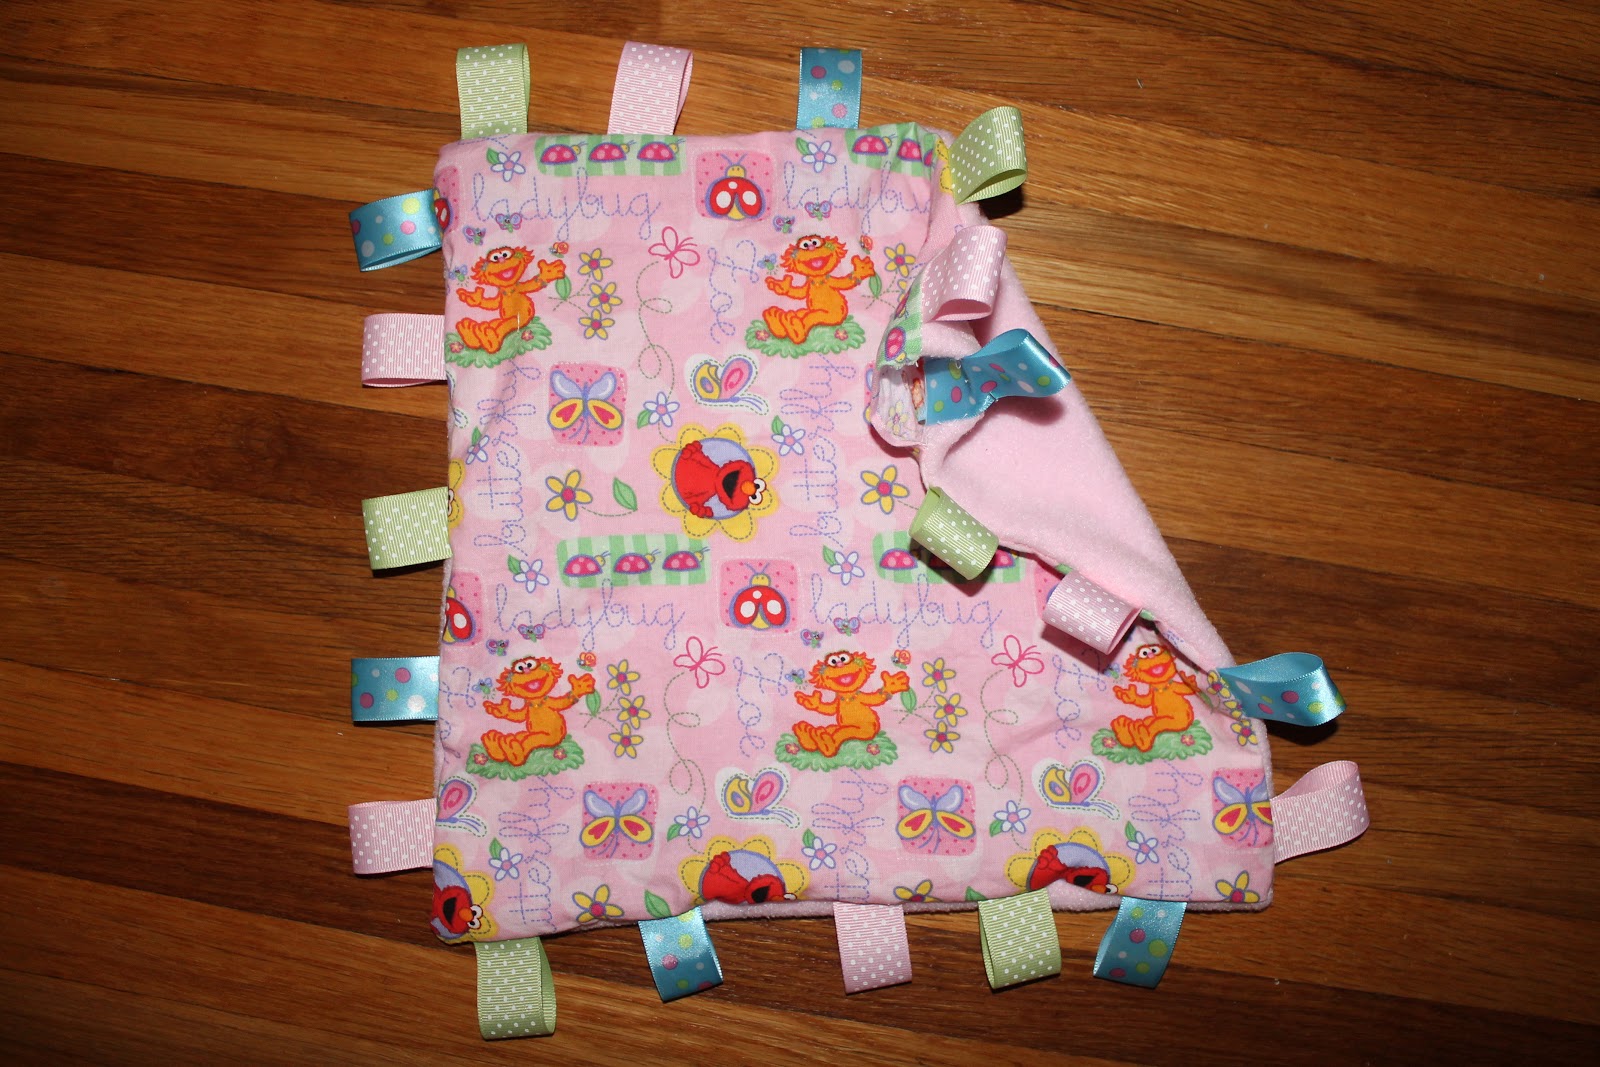
Sew around the blanket, leaving a hole and then turn the blanket inside out. Take out all of the pins (you wouldn't want a baby finding on later)!

Sew the hole shut with a ladder stitch.


Then sew around the inside  edge of the of the blanket. Then you're finished!


Happy crafting!  -Kristen


Sunday, April 7, 2013

Hanging Crib Toy Bag

Our 15 month old son wakes up before us in the morning. We get a little more sleep if he plays for a while. He does better if he has toys, but I don't just want toys lying all over his crib while he sleeps just so he can have them in the morning. So I decided to make a bag to hang in his crib that will hold his toys so he can play with them when he wakes up, but they are not in his way during sleep. 


My husband is a chef and recently retired a pair of his work pants. I decided to use part of the fabric to make this bag. I simply cut off a piece the size I wanted with an extra 2 inches for seam allowance. I cut it in way that left the two leg seams in tact. You can create the same effect by sewing two pieces of cloth together two opposite sides (do this with the right sides facing each other).

Then, with the right sides facing each other, sew across the bottom of your bag. 


I also hemmed the top edges of my bag. 


Then I turned the bag right side out and sewed two ribbons onto the back. 


You can see I sewed them in two places for extra holding strength.


I then tied the bag onto my son's crib. 


I wrapped the ribbons around two bars and then tied the two ribbons together in the middle so that the bag was on a little tighter. 


I put E in his crib and he went straight for the bag. Of course, he took the toys out and directly threw them on the floor. But I'm hoping when he actually wakes up tomorrow morning, he will play with the toys instead of flying them out of his crib!


NOTE: Make sure that the bag is not low enough down that it could cover your child's face during sleep and also be sure to tie the bag on very tight, so it cannot be pulled off and pulled over your child's face. Any cloth in a crib can be a suffocation hazard, so always use caution! 


Hopefully this will help me enjoy a few extra minutes of sleep in the morning since E will have toys to play with in his crib! Happy Sunday!  -Kristen